- Lansweeper Community
- Knowledge Center
- Knowledge Base
- Sites
- Link Lansweeper On-prem with Lansweeper Sites
- Subscribe to RSS Feed
- Bookmark
- Subscribe
- Printer Friendly Page
- Report Inappropriate Content
- Article History
- Subscribe to RSS Feed
- Bookmark
- Subscribe
- Printer Friendly Page
- Report Inappropriate Content
on
05-24-2020
08:30 PM
- edited on
08-01-2024
11:44 AM
by
Nils
![]()
This article explains the process of linking a local Lansweeper installation with our cloud-hosted Lansweeper Sites platform, providing step-by-step instructions.
Lansweeper Sites offers a new way for you to use and access Lansweeper. This cloud-hosted platform not only provides existing Lansweeper functionalities but introduces many new features as well.
If you're a new customer and do not have a Lansweeper On-prem installation, install the Lansweeper Cloud-first trial.
If you're an existing customer with a Lansweeper On-prem installation, link your installation with a Lansweeper Site.
If you're an existing customer and want to create a new Lansweeper installation that's linked with cloud, Install Lansweeper Sites.
If you're only interested in on-premises installations, install Lansweeper On-prem.
Prerequisites
You need an existing, up-to-date Lansweeper On-prem installation to link with Lansweeper Sites. Install or update Lansweeper On-prem using the latest available installer, if you haven't already. Follow the installation instructions and update instructions to ensure full compatibility with Lansweeper Sites.
Link with Lansweeper Sites
Once you've set up your Lansweeper installation and scanned your data, you can start the process of linking the installation with the site.
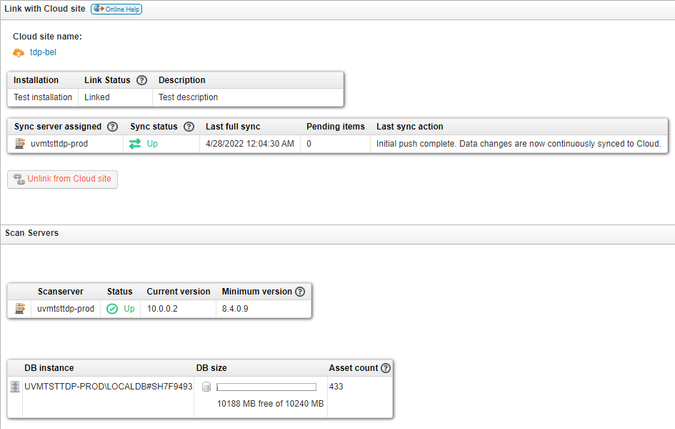
- On the server hosting your local Lansweeper installation, go to the web console and select Link with Cloud site.
Every 12 hours, prerequisite checks are performed in the background of your system to ensure your installation can be linked to a cloud site. - Select Link with Cloud site. If you have multiple scan servers, you will be asked which one should be responsible for syncing with Lansweeper Sites. This server will be the sync server.
If any prerequisite checks have failed, follow the provided instructions to resolve them and select Retry when you're ready. For more information, see Lansweeper Sites linking requirements.
You only need one sync server for your entire local installation. - Enter your email address and select Confirm.
If you have not created a Lansweeper account yet, select Register.
If you aren't logged in yet, you will be redirected to a login page. - Either select an existing site in the list to link to, or create a new site. If you select Create new site, Lansweeper Sites will create a site for you.
To link an installation with Lansweeper Sites, you must create at least one site in your account. You can create multiple sites to further group and separate your local installations. For more information, see Create a site in Lansweeper Sites.
If a site appears to be locked, you might not have permission to link to that site. - Select Copy linking code.
- Enter your site's linking code in the local web console and select Submit.
- After Lansweeper has verified the site's linking code, your local installation will perform an initial sync with Lansweeper Sites. Depending on how much data is in your local Lansweeper installation, this process might take a while.
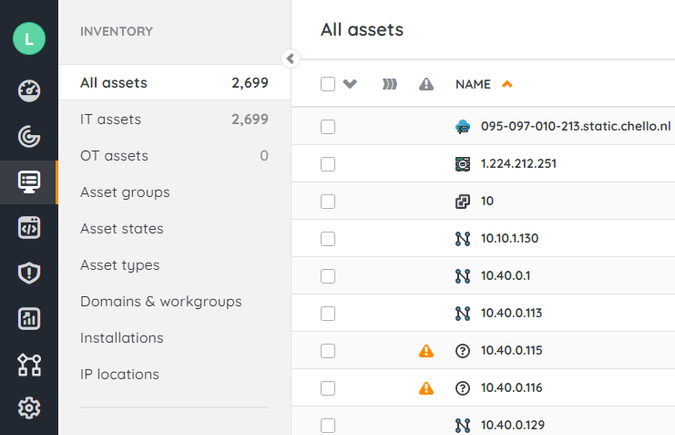
- Your Lansweeper Site will display your installation's data in the Inventory module. More information on the Inventory module can be found in View assets.
- Browse to Configuration > Installations to view the details of your linked installations. If you have multiple local installations linked to the same site, all of these installations will be listed there.
You can switch between sites using the Change site menu in the top left corner of the interface.
Was this post helpful? Select Yes or No below!
Did you have a similar issue and a different solution? Or did you not find the information you needed? Create a post in our Community Forum for your fellow IT Heroes!
More questions? Browse our Quick Tech Solutions.
New to Lansweeper?
Try Lansweeper For Free
Experience Lansweeper with your own data. Sign up now for a 14-day free trial.
Try Now


