- Lansweeper Community
- Knowledge Center
- Knowledge Base
- Scanning your network
- Introduction to Asset Radar
- Subscribe to RSS Feed
- Bookmark
- Subscribe
- Printer Friendly Page
- Report Inappropriate Content
- Article History
- Subscribe to RSS Feed
- Bookmark
- Subscribe
- Printer Friendly Page
- Report Inappropriate Content
on
02-02-2020
07:30 PM
- edited on
08-01-2023
11:49 AM
by
Nils
![]()
This article provides an introduction to the Asset Radar feature. Asset Radar is a credential-free scanning method that retrieves asset information based on captured network packets. Once this feature is set to Enabled or Logging Only, your Lansweeper server continuously captures specific network packets flowing within its own subnet, not just packets directly addressed to your Lansweeper server.
Asset Radar serves to quickly capture information about devices (e.g. BYOD and rogue devices) that connect to your network. It leverages network capture technology in use by well known packet tracing software to discover device information. If an IPv4 or IPv6 address is found while capturing and Asset Radar is set to Enabled, the device is added to the IP scanning queue for a more complete scan and an asset may be generated. Your mapped credentials are used at this point.
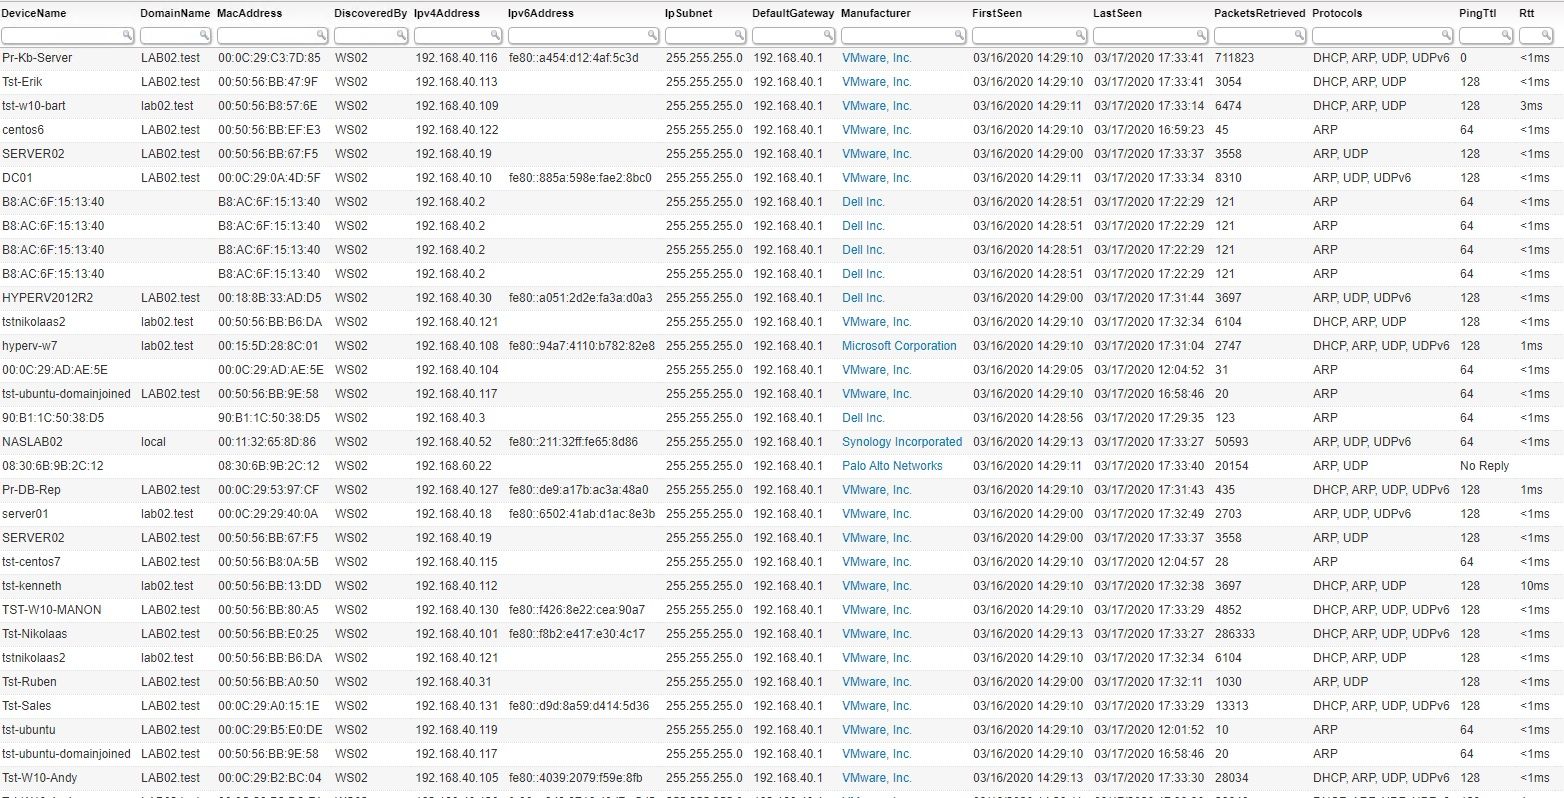
In this introduction to Asset Radar we'll go over the necessary steps for configuring the feature. This introduction also shows sample data retrieved by Asset Radar.
Configuring Asset Radar
Asset Radar's configuration consists of multiple steps:
- Checking whether your scanning server is compatible with Asset Radar.
- Selecting which interfaces you'd like to enable.
- Selecting the mode under which you'd like to run Asset Radar.
Asset Radar can be configured on a per-scanning server basis or for multiple scanning servers at once, using the All Scanservers tab found under Scanning > Compatibility & Settings in the web console.
Compatibility checks
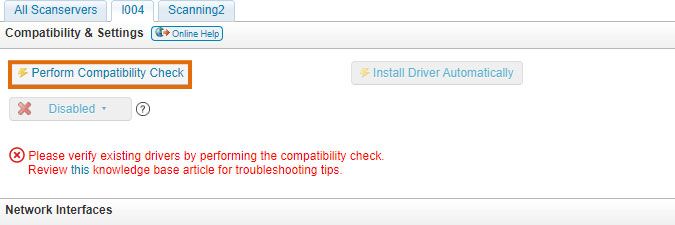
To be able to use Asset Radar, your Lansweeper server must have the Npcap driver 0.96 or newer installed, or alternatively WinPcap 4.1.3. You can install the latest Npcap driver manually or have it done automatically by going to Scanning > Compatibility & Settings in the web console and clicking Perform compatibility check. This triggers a check for the driver.
Interface selection
Lansweeper gathers a list of all interfaces that are operational on your scanning server and makes them available under the Scanning > Compatibility & Settings page. This list of adapters is refreshed every hour and a refresh can be forced by restarting the Lansweeper Server service. Go to the Scanning > Compatibility & Settings page and tick the Enabled checkbox of all interfaces you'd like to capture packets from.
Asset Radar modes
Asset Radar can be set to 3 different modes: Disabled, Logging Only or Enabled. The mode can be selected under Scanning > Compatibility & Settings, after a successful compatibility check.
- When set to Disabled, no packets are captured and no assets are generated.
- When set to Logging Only, packets are captured and logged but assets are not automatically generated.
- When fully Enabled, packets are captured and these packets are sent to the scanning queue, so assets are generated. Assets that are sent to the queue make use of your scanning credential mappings. Go to Scanning > Compatibility & Settings to select which mode you'd like Asset Radar to run under.
Managing captured data
All packets discovered via Asset Radar are logged and can be viewed via the Scanning > Asset Radar Logs menu. Log pages are available for all scanning servers or for individual scanning servers.
On these pages, you can see the type of packet that was captured, as well as the retrieved information from these packets. ARP, DHCP, UDP and UDPv6 packets are captured. The retrieved information includes the packet's device name, MAC, IPv4 and IPv6 addresses as well as other network information such as the default gateway, subnet, PingTTL and RTT.

Assets that were specifically scanned and created as a result of Asset Radar can be viewed via Assets > Asset Radar Assets.
New to Lansweeper?
Try Lansweeper For Free
Experience Lansweeper with your own data. Sign up now for a 14-day free trial.
Try Now


