- Lansweeper Community
- Knowledge Center
- Knowledge Base
- Sites
- Introduction to the report builder
- Subscribe to RSS Feed
- Bookmark
- Subscribe
- Printer Friendly Page
- Report Inappropriate Content
This documentation is for the old UI. For documentation for the new preview UI, Knowledge Base - Preview UI.
- Article History
- Subscribe to RSS Feed
- Bookmark
- Subscribe
- Printer Friendly Page
- Report Inappropriate Content
on
06-29-2021
08:30 PM
- edited on
12-17-2024
02:32 PM
by
sophie
![]()
This page introduces the Lansweeper Sites report builder and provides a step-by-step guide to creating customized reports tailored to your needs.
Lansweeper Sites includes a new and intuitive report builder. In addition to built-in reports found in the Reports module, you can build your own custom reports using the report builder.
We'll explain the concept of data collections, the building steps of the report builder, and the result pane. Finally, we'll guide you through the creation of a basic custom report in our step-by-step building guide.
Data collections
A data collection is a predefined collection of data. Lansweeper uses MongoDB to store your cloud data. Lansweeper Sites currently offers 3 data collections:
- Device and software: The Device and software collection groups all asset and software data in one collection.
- Office 365: The Office 365 data collection contains all scanned Office 365 data.
- User: The User collection contains all relevant user data.
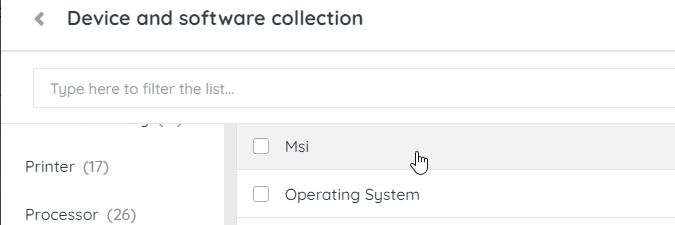
Each data collection is presented with a list of fields that are available in the collection. When a data collection set is selected, you can use the search bar on top to quickly search for a field, or you can navigate through the data collection using the categories.
Building steps
Any report is built using three main steps. The report builder offers an intuitive visual representation to easily guide you through each of these steps.
- Select all required fields.
- Filter the retrieved data to obtain the desired result set.
- Optionally group the data to show cumulative results.
Result pane
Each building step has a result pane on the right-hand side of the building step.
When building a report, the result pane will show a limited number of records for you to verify the result of each building step. The complete report data will only be available when the report is saved and sent to the reporting queue.
Create a report
In this step-by-step guide, we will build a basic report showing all assets with a certain software installed.
Select the fields
- Go to the Reports module and select Create new report.
- In the New report view, select Fields to choose the fields you want to report on.
- Choose a collection of fields. For example, if you'd like to report on asset and/or software data, select the Device and software collection.
- Select the fields you want to report on. In our example, we are using "Asset Name", "First Seen", "Last Seen", and "Software Name". Select Apply to continue.
Filter the results
- Add a new step by selecting Add step.
- Select Filters to add your filter criteria.
- Select the field you want to filter on. In our example, we use "Software Name".
- Select the operation you want to perform. In our example, we use the "Contains" operator.
- Enter the value you want to filter on. In our example, we enter "VMware".
The result pane immediately shows a limited example of the filtered data.
You can add more filter criteria by clicking "+" and repeating the previous steps.
Group the filtered results
- Add a new step by selecting Add step.
- Select Group to add your grouping criteria. In our example, we select to group by "Software Name".
To see the result count, tick the Show results count option.
Save the report
- Select Save Report.
- In the pop-up window, enter a name and description, and choose the category you want to save your report in.
- After a report is saved, it gets added to the report running queue.
You can find all custom reports you've created via the Reports > Custom reports menu. Additionally, if you've saved them under a specific category in the previous step, the report will also be found there.
If you'd prefer, you can also build reports using the code editor. For more information, check out Working with the code editor.
Was this post helpful? Select Yes or No below!
Did you have a similar issue and a different solution? Or did you not find the information you needed? Create a post in our Community Forum for your fellow IT Heroes!
More questions? Browse our Quick Tech Solutions.
New to Lansweeper?
Try Lansweeper For Free
Experience Lansweeper with your own data. Sign up now for a 14-day free trial.
Try Now


