- Lansweeper Community
- Knowledge Center
- Knowledge Base
- Scanning your network
- Introduction to the MIB Importer and MIB Library
- Subscribe to RSS Feed
- Bookmark
- Subscribe
- Printer Friendly Page
- Report Inappropriate Content
- Article History
- Subscribe to RSS Feed
- Bookmark
- Subscribe
- Printer Friendly Page
- Report Inappropriate Content
on
02-02-2020
07:30 PM
- edited on
08-04-2023
08:32 PM
by
sophie
![]()
SNMP is one of the protocols through which Lansweeper can retrieve data from network devices like printers, switches, routers etc. By default, Lansweeper retrieves various properties from these devices via SNMP. This includes basic details like serial number and description, but also more advanced details like interface and printer toner information.
Lansweeper allows you to scan custom SNMP OIDs as well. You can manually submit these OIDs or, from Lansweeper 8.0 onward, import them from a MIB file using the MIB Importer or MIB Library.
MIB Importer
With the MIB Importer, you can upload your own MIB files and view their contents. You can search in your MIB files for specific keywords to easily find the OIDs and thus the data you want to scan. To add your own MIB file to your Lansweeper installation so you can scan OIDs from it, follow these steps:
Step 1: gather the MIB files
Gather the MIB files for your specific network device. You can usually find these on the device manufacturer's website.
Step 2: check your permissions
Make sure your user role includes the Access Data Selection permission. If it doesn't, you won't be able to access the custom OID scanning configuration. More information on configuring website access and specifying who has what permissions can be found in this article on restricting web console access.
Step 3: navigate to the MIB Importer
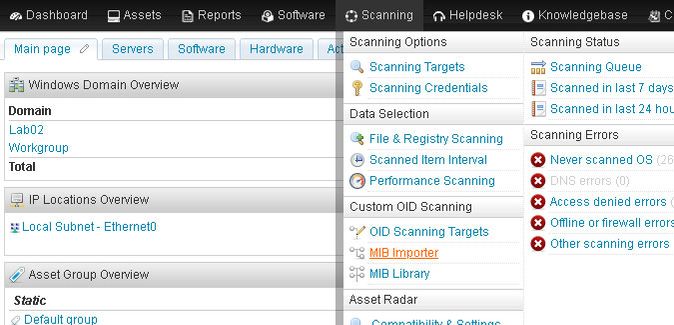
Browse to the following section of the web console: Scanning > MIB Importer.
Step 4: choose your files
Click Choose Files and select the MIB file you want to import. You can select multiple files.
Step 5: select the OIDs
From your MIB file, select one or more OIDs you want to scan for your network devices. You can also use the search bar at the top to filter the OIDs in your MIB file.
Step 6: add the OIDs to a scanning target
Select Add to existing target or Add to new target to add the selected OIDs to a scanning target.
Add to existing target
Select an existing target to add your selected OIDs to.
Add to new target
From the Type dropdown in the resulting pop-up, select the collection of assets you want to retrieve the OID data for. You can retrieve the OID data for a single asset, assets in a specific static or dynamic asset group, assets of a specific type, assets in a specific IP range or assets in a specific asset report from the Reports menu. Make sure the Enabled checkbox is ticked so the target will be enabled once you complete the configuration.
Optionally, you can tick Delete On Rescan. This is a cleanup option to prevent old OID data from being left behind on asset pages. If ticked, Lansweeper will first delete the OID data associated with the target upon rescanning a specific device. It will then rescan the OID data and add fresh data to the device.
You can also submit a description for your OID scanning target. This can be anything you want and is only displayed in your OID scanning configuration. Submit your label and OID. The label can be anything you want and is displayed next to scanned data on asset pages.
Step 7: rescan your assets
Rescan the assets linked to a custom OID target to retrieve the OID data you configured. You can find scanned data in the Scanned OIDs tab of the asset's page.
MIB Library
The MIB Library can be found in the Scanning > MIB Library section of the web console. This feature allows you to import MIB files from an online library hosted by Lansweeper. The library also contains files uploaded by Lansweeper users and approved by Lansweeper.
Lansweeper's MIB library allows you to save time searching for MIB files and to find new and interesting OID data. To find an OID for the data you want to scan, you can use the search bar. Enter a keyword to find OIDs for the data you want to scan and hit the search button. You can select OIDs from the library and add them to a new or existing OID scanning target.
Was this post helpful? Select Yes or No below!
Did you have a similar issue and a different solution? Or did you not find the information you needed? Create a post in our Community Forum for your fellow IT Heroes!
More questions? Browse our Quick Tech Solutions.
New to Lansweeper?
Try Lansweeper For Free
Experience Lansweeper with your own data. Sign up now for a 14-day free trial.
Try Now


