- Lansweeper Community
- Knowledge Center
- Knowledge Base
- Sites
- Install Lansweeper Sites
- Subscribe to RSS Feed
- Bookmark
- Subscribe
- Printer Friendly Page
- Report Inappropriate Content
This documentation is for the old UI. For documentation for the new preview UI, Knowledge Base - Preview UI.
- Article History
- Subscribe to RSS Feed
- Bookmark
- Subscribe
- Printer Friendly Page
- Report Inappropriate Content
on
01-30-2023
02:48 PM
- edited on
07-22-2025
03:22 PM
by
Nils
![]()
This page guides you through the process of installing Lansweeper Sites.
From version 10.4 onwards, Lansweeper can be installed and immediately linked to the cloud environment. The Lansweeper installer allows you to create and link with a Lansweeper Site immediately during the installation. Use the steps below only if you don't have a Lansweeper license yet.
If you're a new customer and do not have a Lansweeper On-prem installation, install the Lansweeper Cloud-first trial.
If you're an existing customer with a Lansweeper On-prem installation, link your installation with a cloud site.
If you're an existing customer and want to create a new Lansweeper installation that's linked with cloud, install Lansweeper Cloud.
If you're only interested in on-premises installations, install Lansweeper On-prem.
Install Lansweeper Sites
- Start by downloading the installer. The latest Lansweeper installation can be found here. Download the latest version after you've provided your email address.
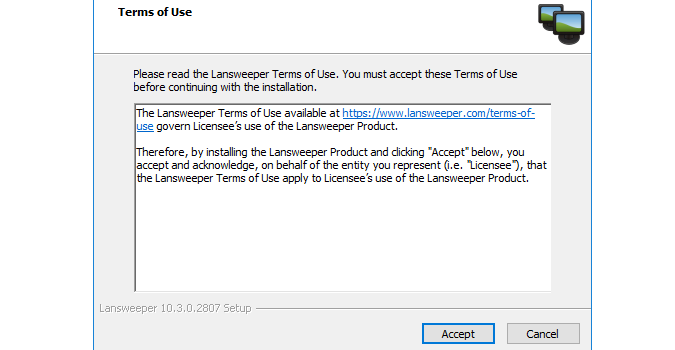
- Double-click the installer on a server you will use as a scanning server. In the first dialogue, review the Terms of Use and select Accept.
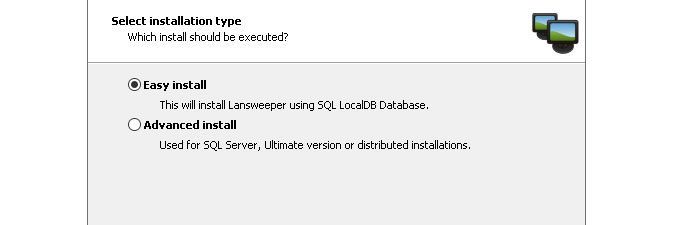
- The next dialogue provides the option to choose between an "Easy install" and an "Advanced install".
With the Easy install option, a Lansweeper scanning service and a database will be installed.
If you selected the Easy install type, you can skip to step 8. - If you selected the Advanced install method, you can select SQL Server as your database type, submit the name of the SQL Server instance you want to install the Lansweeper database under. This should be the same SQL Server instance name you use when logging into other SQL tools like SQL Server Management Studio.
- Select the authentication method you want to use to connect to SQL Server from the Authentication dropdown. You can choose Windows authentication or SQL Server authentication. If you choose Windows authentication, the database installation is performed under the currently logged on Windows user.
If you choose SQL authentication, you need to submit your SQL username and password.
The user performing the database installation must be a member of your SQL Server's sysadmin server role. When the installation has completed, the Lansweeper service and web console will connect to the database with a newly created SQL user called "lansweeperuser", which only has access to the Lansweeper database. - If you are installing the Lansweeper web console, select the web server you want to install the console under. Selecting Recommended will install the web console under IIS Express, selecting Advanced will install the web console under IIS. The Advanced option will only be available if IIS is already enabled on your computer.
- You can choose a custom HTTP and (if offered by the installer) HTTPS port used for the web console. If you don't choose custom ports, the installer will automatically install the web console under the first available ports. Select Next to continue.
- The Lansweeper service will be installed under Windows Services.
- The Lansweeper database will be installed under the database server of your choice, will be called "lansweeperdb" and should not be renamed.
- If selected, the Lansweeper web console will be installed under the web server of your choice and your preferred ports.
- If your web server's registry keys indicate that you have allowed insecure SSL renegotiation, you will be prompted to disable insecure SSL renegotiations.
Disabling insecure renegotiation is optional, but recommended for improved system security.
The registry key for this setting can be found atComputer\HKEY_LOCAL_MACHINE\SYSTEM\CurrentControlSet\Control\SecurityProviders\SCHANNEL.
Disabling insecure SSL/TLS renegotiation configures the system to refuse renegotiation requests from clients, preventing potential abuse and reducing the attack surface of your server.
This setting applies system-wide and will affect all SSL/TLS connections on this system, not just Lansweeper. - The installation will only take a few minutes. When ready, the first run wizard will start. Select Choose Cloud management.
By selecting Choose Cloud management, your scan server will connect directly to the cloud, and your cloud site will become your primary asset management console.
Additionally, you will not need a license key, since your subscription is managed from the cloud. - Prerequisite checks are ran to check if your installation is ready to sync to Cloud. One of the main checks is testing internet access. More information on the requirements can be found here.
If the internet access prerequisite check fails, you can define a proxy server to allow your scanning server to connect to the internet. - After the prerequisites are all met, you can start creating a site by going to app.lansweeper.com.
- Enter your email and password, or register with one of the available social login options.
Make sure to look for and follow the instructions in your account verification email. You must verify your email address within 24 hours. - Enter a name for your site and select Create.
Pick your site name carefully, as this name is used as part of your site URL. The display name of a site can be changed after creation, but the internal name used in the URL cannot. Your site name must be unique and may not contain spaces.
To link an installation with Lansweeper Cloud, you must create at least one site in your account. You can create multiple sites to further group and separate your local installations. For more information, see Create a site in Lansweeper Cloud. - Select Get linking code to be redirected to your new site.
If you selected Access empty site instead, you can get your linking code from your site by going to Configuration > Installations > Link an installation. - In the pop-up, select Create new code.
- Choose an expiration date, select Apply and select Copy code.
- In the installer, enter the linking code and select Next.
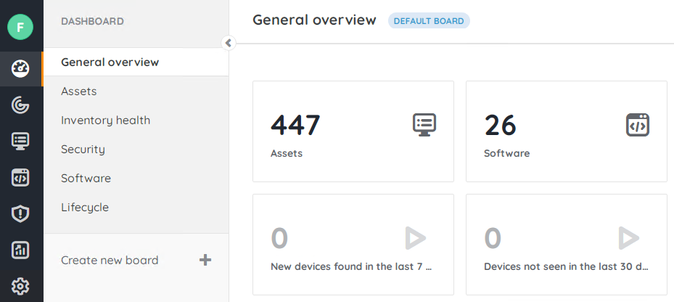
- The installation and setup for Lansweeper will now complete. You will be redirected to your site in app.lansweeper.com. You can now start exploring your scanned data in Lansweeper Sites.
Was this post helpful? Select Yes or No below!
Did you have a similar issue and a different solution? Or did you not find the information you needed? Create a post in our Community Forum for your fellow IT Heroes!
More questions? Browse our Quick Tech Solutions.
New to Lansweeper?
Try Lansweeper For Free
Experience Lansweeper with your own data. Sign up now for a 14-day free trial.
Try Now


