- Lansweeper Community
- Knowledge Center
- Knowledge Base
- Installation
- Getting Started
- Subscribe to RSS Feed
- Bookmark
- Subscribe
- Printer Friendly Page
- Report Inappropriate Content
- Article History
- Subscribe to RSS Feed
- Bookmark
- Subscribe
- Printer Friendly Page
- Report Inappropriate Content
11-01-2021 07:30 PM - edited 06-05-2024 09:07 AM
In this quick start guide, we'll cover how you go from installing Lansweeper Classic to successfully scanning Windows devices. At the bottom of the page, you'll be able to find links to resources that cover all device types that Lansweeper scans so you can discover any device in your IT environment.
We'll cover a Windows device specifically in this article since this is the most frequently scanned asset. At the bottom of the page, you'll be able to find links to resources that cover all device types that Lansweeper scans.
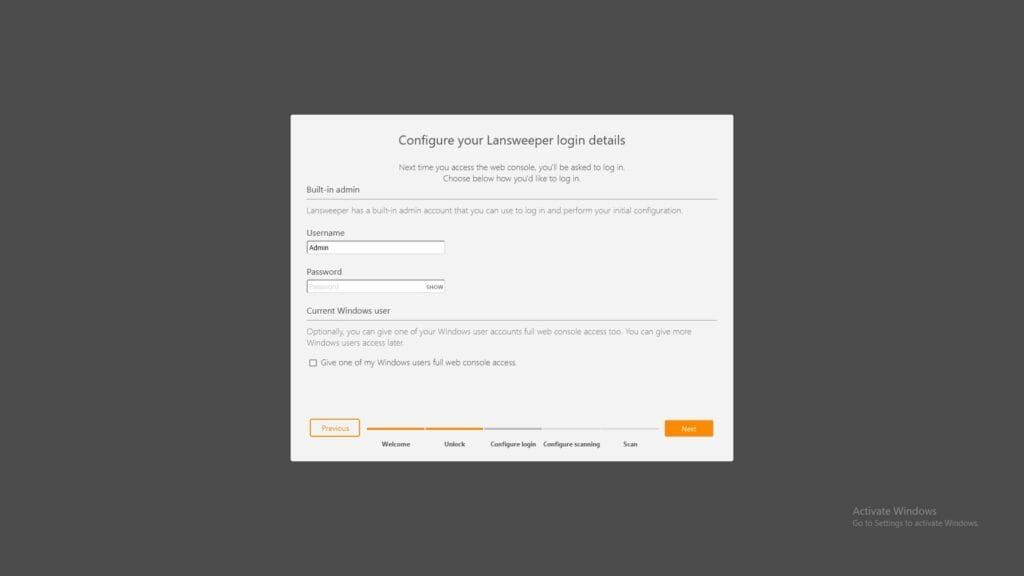
After installing Lansweeper Classic, you'll start with our first run wizard. Here, you'll get the chance to configure your admin account and select your first subnet before scanning commences.

Viewing Your Assets
Once completed, you'll see the assets overview and thanks to our credential-free scanning, your subnets' assets should already be there with basic data. To help you get started with getting more data from your devices and detect the rest of your network, we've compiled everything you need to do below.
Preparing Your Devices
Before starting, make sure that the Windows device is configured correctly so that Lansweeper is able to connect to the device and retrieve data. Since Lansweeper does not require an agent for scanning, certain network configurations might be needed depending on your environment.
The initial connection to a client machine is made over TCP port 135. By default, Windows sends the WMI data over random ports in the 1025-5000 or 49152-65535 range. In order to remotely scan Windows computers, you must ensure that the machines' firewalls are properly configured to allow all WMI traffic. Opening specific ports is not enough, as traffic is sent over random ports.
Option 1: Lansweeper Script
The first and easiest option is to run the following script on your Windows devices. This ensures that DCOM, Windows Firewall, and other settings are correct. You can open the script in a text editor to review its contents, before executing in Command Prompt.
Download (right-click and Save Link As) and run this script in an elevated Command Prompt on the client machine.
Option 2: Command Prompt
The second option is to use two command prompt commands to perform the needed changes. Run the commands below in an elevated Command Prompt on the client machine. These commands will run successfully on both older and newer operating systems. They may generate deprecation warnings on newer operating systems but are functional there as well.
netsh advfirewall firewall set rule group="Remote Administration" new enable=yes
netsh advfirewall firewall add rule name="TCP Port 135" dir=in action=allow protocol=TCP localport=315
Option 3: Manually
If you're more of a hands-on person, you can do the changes manually by configuring the firewall using the Windows interface, you can find all the steps to do this in the Configuring Windows Firewall knowledgebase article.
Adding Your Credentials
The next step in getting more data is providing credentials. To gather detailed information from devices and services, credentials are a requirement. For Windows, credentials must meet the following requirements:
- The credential must have administrative privileges on the target machine.
- If you plan on scanning via Active Directory, the credential must also have read-only access to Active Directory.
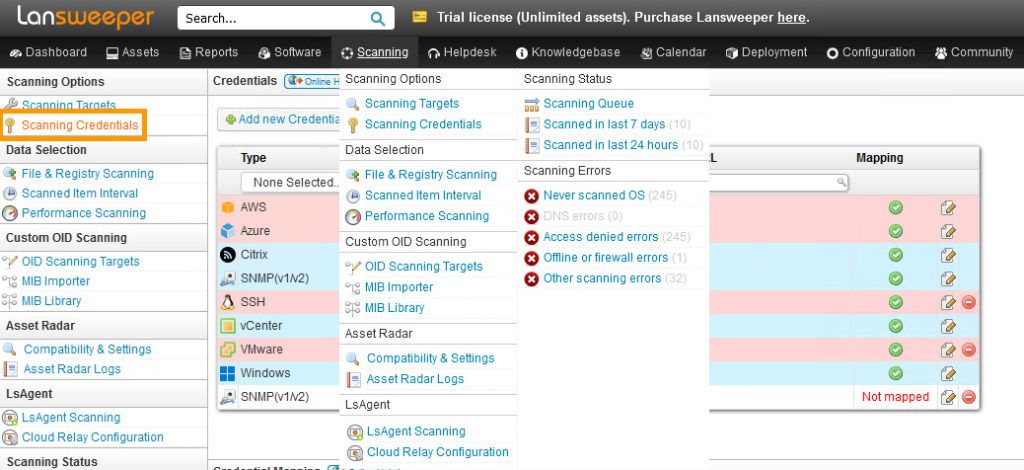
Navigate to Scanning Credentials
Head over to Scanning > Scanning Credentials using the top menu.
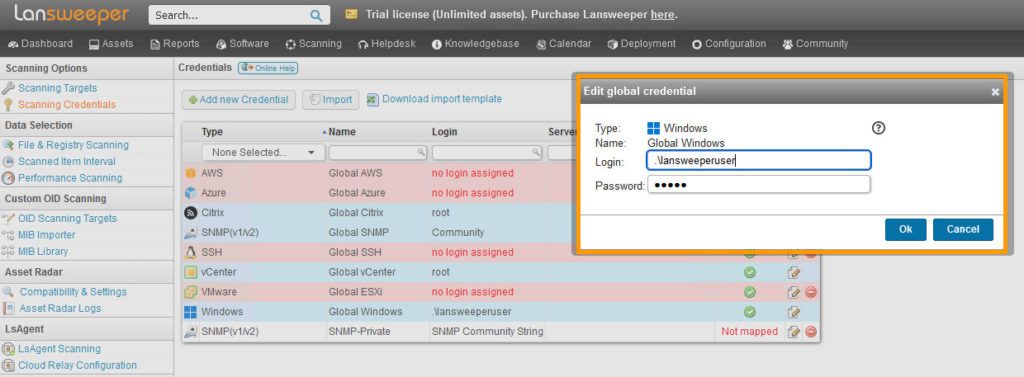
Edit the Global Windows Credential
Click the edit button on the Global Windows credential. The global credentials are your default credentials. They will be automatically tried by most scanning targets.
If you have a credential that meets the previously listed requirements, you can enter it in one of the following formats:
- If you use a domain credential, submit a down-level login name like NetBIOS domain name\username or a user principal name (UPN) like username@yourdomain.local
- For local credentials, use the format .\username
- Microsoft accounts like username@outlook.com can be used as credentials as well
Choosing your Scanning Target
Now that you have a global Windows credential, the Asset Radar scanning can also use this once it attempts to scan an asset, so even without any further steps, you'll start seeing more detailed information on Windows assets soon.
Navigate to Scanning Targets
Head over to Scanning using the top navigation.
Add an IP Range Scanning Target
The simplest and arguably most powerful scanning target is the IP Range scanning target. This will attempt to scan every single IP Address in the IP range you enter.
Click the Add Scanning Target button and select the IP Range scanning target. You can enter any of your local subnets' IP Range in the two provided boxes.
As you'll see there are more options to configure, but we will leave those in their default state for now. You can find more info about them in the IP Range knowledgebase article. Once you're ready, click OK at the bottom.
Scan your IP Range scanning target
Now that your scanning target is ready, you can scan it immediately by clicking the Scan Now button.
LsAgent
If the configuration above conflicts with your strict security policies, or if you have a lot of devices outside of your corporate network. You can use LsAgent to scan devices either locally or remotely without any configuration!
Additional Scanning Methods
- Overview of scanning targets and methods
- Scanning with an Active Directory Domain scanning target
- How to scan mobile devices through VMware AirWatch
- How to scan an AWS cloud environment
- How to scan an Azure cloud environment
- How to scan Chrome OS machines
- Scanning Intune using MS Graph
- O365 scanning via MS Graph
- Lansweeper Community integration with SCCM
New to Lansweeper?
Try Lansweeper For Free
Experience Lansweeper with your own data. Sign up now for a 14-day free trial.
Try Now


